Estimated reading time: 4 minutes
Table of contents
Milk foaming for coffee is easy. The key is not to try too hard.
Making micro foam is a straight forward affair. It does require practice to get right.
We will be stretching the milk. Creating more volume from an amount of milk by raising it’s height.
Do not concentrate too much on the stretching element. You may end up with stiff foam on the top and milk at the bottom. We want a foamy milk texture more or less throughout the jug texture like white paint.
Milk foaming for coffee – buy the right milk !
Massively import that first of all buy fresh milk. If there is one thing to be taken from this guide this is it. Foaming milk separates the fat from the protein. Once this is done the milk is dead. It will foam no more.
If the milk has been stored at the wrong temperature at any point in the journey from cow to jug it will not foam. Because the fat and protein have already separated.
First of all start off with the freshest milk possible. When in the shop, ignore cartons at the front of the shelf go to the back.
This is where the freshest milk lives. Buy milk with the longest used by date on offer. Successful milk foaming for coffee depends on this.
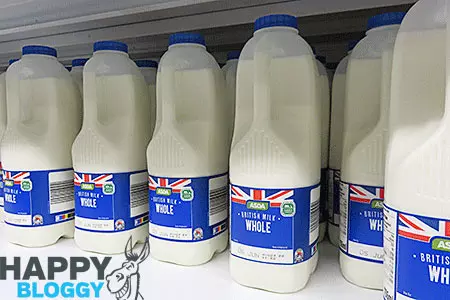
If this is your first attempt at foaming milk for coffee buy full fat (blue top) milk. Blue top has the most fat and therefore the best chance of foaming correctly.
Use a flexible coffee blend like Happy Donkey classic Italian beans
Preparation.
Milk should be foamed at a temperature of no higher than 160 degrees Fahrenheit, the ideal temperature is between 140 and 160 degrees.
The best way to measure the temperature is to use a milk thermometer and a milk foaming jug.
The milk thermometer simply clips onto the edge of the jug. It is easy to see where you are going by keeping an eye on the fog free dial.
A good way to use this thermometer is to turn the steam off when it goes just past 130 degrees. The milk will continue heating but rarely go above the 140 degree mark. Which is where we think the best results are gained.
It is easier to foam with a bigger jug and a larger volume of milk to start with.
Milk foaming for coffee – procedure.
- Start
Fill a 0.6 or a 1 Litre jug to just under where the bottom of the spout starts inside.
- Blast
Now aim the bottom of the steam wand towards the drip tray of the machine. Give it a 3 second blast. The blast gets rid of all the condensation that builds up inside when not in use.
- Position
Rest the edge of the steam wand against the inner edge of the milk jug. Placing the tip just below the surface of the milk.
- Activate
Turn the steam wand using a 180 degree turn or half way if using levers.
- Listen
If you get a whistling sound your wand is too deep in the milk. If you get a manic airy bubbling sound, it is too high.
- Aspire
What you want is a smooth swirling sound. With the odd sound from time to time that sounds like a Swan Vesta match being struck against a wall. When you have it right you will see the milk swirling in the jug, rolling in a circular motion.
- Adjust
Lower the jug ever so slightly now and then. Ensure that the tip of the steam wand is sat just under the surface at all times. Whilst the milk is rising in height and volume.
- Finish
Once the thermometer has reached 130 degrees turn the steam off. Lower the jug away from the steam wand when the thermometer hits 135 or so.
Conclusion.
Now you should have nice foamy milk, if you don’t read the procedure again and try again, it can take some time to grasp the technique, so be patient and you will get there in the end.
If you feel stressed or uncomfortable walk away. This is simple and fun. Clear your mind and come back when you are relaxed. Use all the tips above and go for it, it’s easy.
Ideally put a Saturday morning aside and go buy 8 pints of milk. That’s what I did 20 years ago and I never looked back. Enjoy !
Just bought a coffee machine and grinder for the first time?

