Replacing a Parker or Lucifer coffee machine group solenoid is easy with this step by step online guide to show you how to do it.
Estimated reading time: 11 minutes
Table of contents
Please see the disclaimer at the end of the article before proceeding.
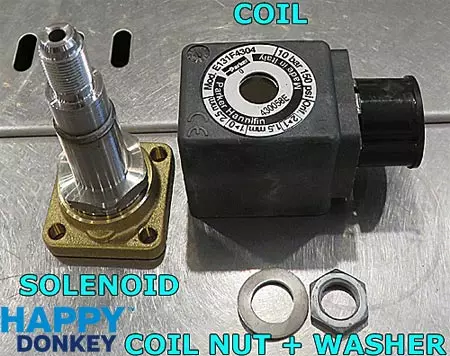
Here are the main components of the coffee machine group solenoid.
The solenoid itself, the coil, nut and washer which hold the coil in place.
The information disk is sat in place on top of the coil, that’s the round silver item with all the writing on.
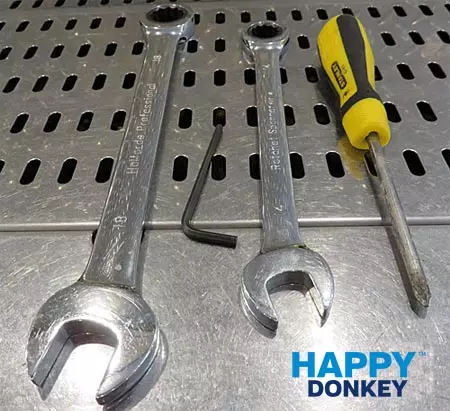
Tools needed as shown : 1 x 14mm spanner, 1 x 18mm spanner, 1 x small screwdriver (posidrive or phillips type), 1 x 4mm allen key.
You can use an adjustable spanner instead of the individual spanners listed.
So long as it opens up to a width measurement of 18mm.
IMPORTANT – BEFORE YOU START ENSURE THE COFFEE MACHINE IS COLD AND HAS NO PRESSURE LEFT IN THE SYSTEM.
DISCONNECT THE MACHINE FROM THE MAINS ELECTRIC SUPPLY.
ISOLATE OR TURN OF THE MAINS WATER SUPPLY CONNECTING TO THE MACHINE.
Instructions
- remove the exhaust
This is highlighted by the blue arrow.
Use the 18mm spanner and turn it to your left towards the machine.
These are rarely done up too tight, so it’s easy.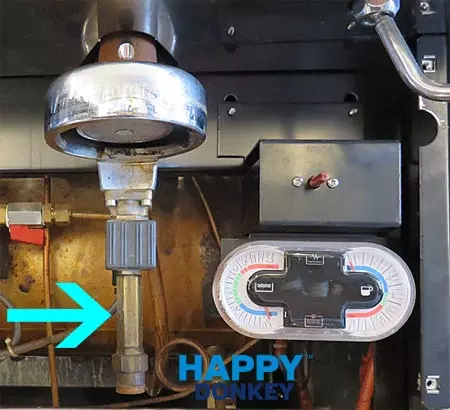
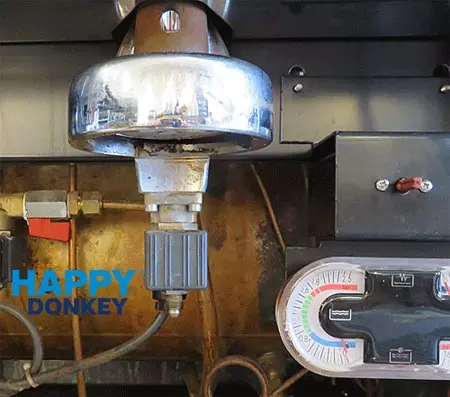
- With the exhaust removed the group head solenoid will look like the image below.
- remove the coil
With the 14mm spanner undo the nut on the bottom of the coil, rotating to the left towards the machine.
This should come off with relative ease.
Catch the washer sat above it, the information disk may well fall off too.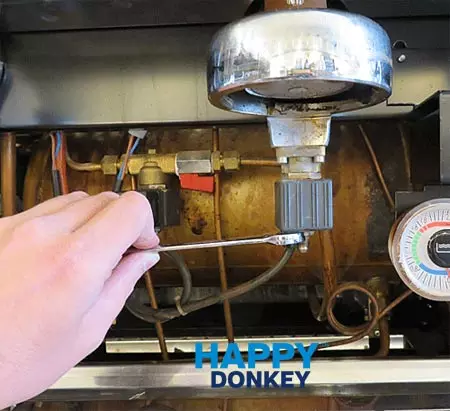
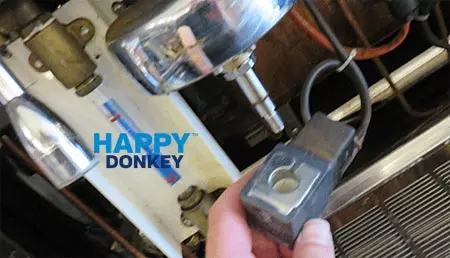
- Pull down
With the nut and washer removed pull the coil downwards as shown in the image below.
At this point the lead is still connected to the coil, rest the coil on the drip tray grill out the way.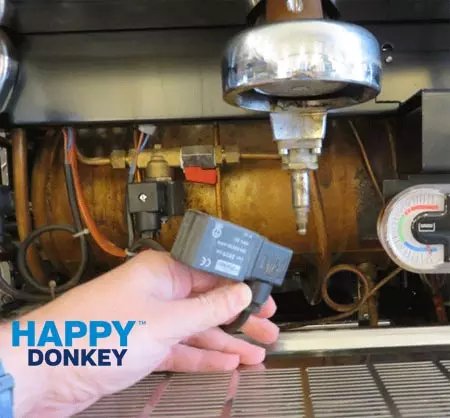
- visual
Here is an image of the nut to remove.
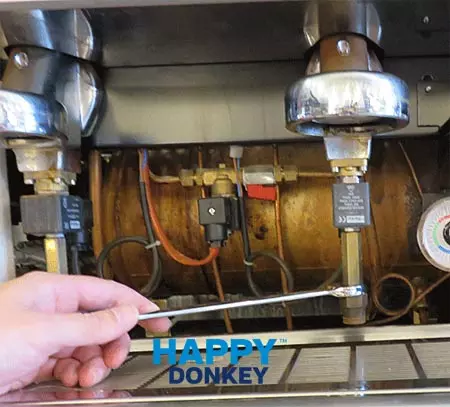
- Unbolt
Undo the allen key bolts with the 4mm allen key.
A longer one is always advantageous as you get more leverage.
There are four bolts in total, 2 at the front and 2 at the back.
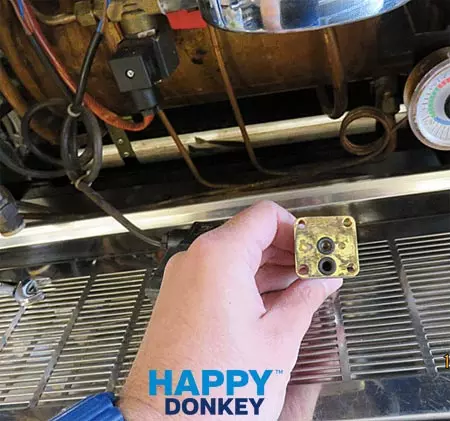
The images below show the bottom of the solenoid body when removed.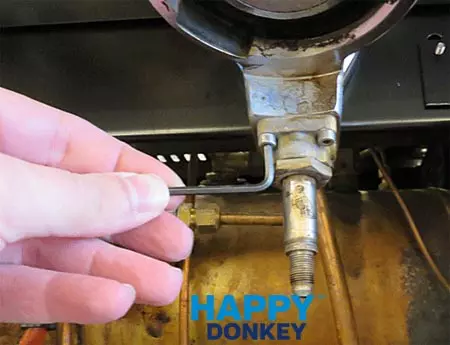
- Note
Note that the base is directional and the o’rings both sit closer to you.
When you put the new one on remember to replicate this.
Otherwise the new one will not work properly.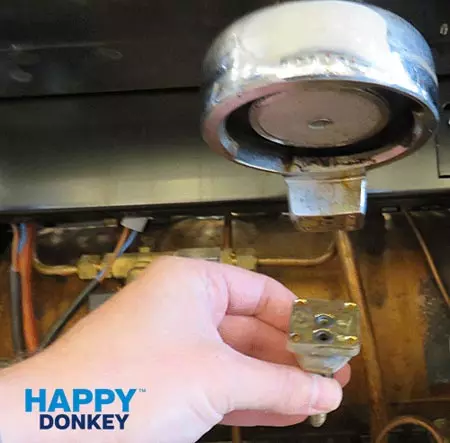
- Alternative view
- Put the new group solenoid body on the head
Remove the coil from your new solenoid with the 14mm spanner, as in step 2.
Fit the new solenoid, taking care to get the o’rings the correct way round as shown in step 3.
Fix to the head with the allen key bolts and tighten with the allen key.
This time turn the nuts to the right.
Ensure they are firmly locked in place.
You should now have a shiny new body fitted like this one.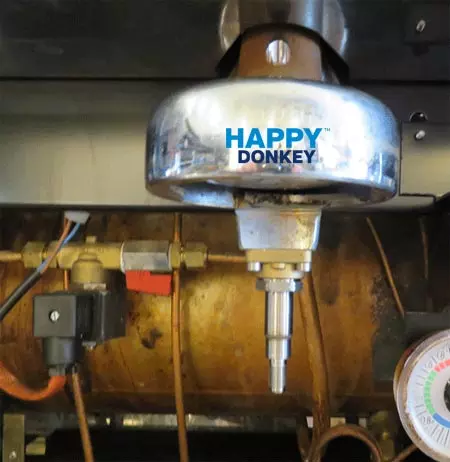
- swap the new coil onto the coil lead
The old coil is still sat in the lead.
Remove the old coil, use the screwdriver to undo the screw, the coil pulls away from the lead as shown below.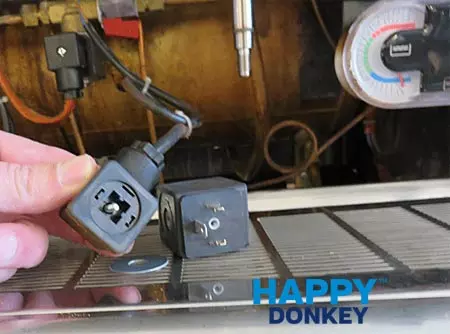
- line it up
The coil lead has three slots in which the pins from the coil slot into.
Line up the pins with the slots and push the lead onto the coil so it is nice and flush.
Do the screw back up, do not over tighten, remember you’ll be doing this again next year ! - fix the new coil onto the solenoid
Now feed the coil onto the solenoid, the coil is directional.
Ensure you feed the side with the metal plate upwards as shown in the images below.
Note the blue arrow, that highlights the metal plate.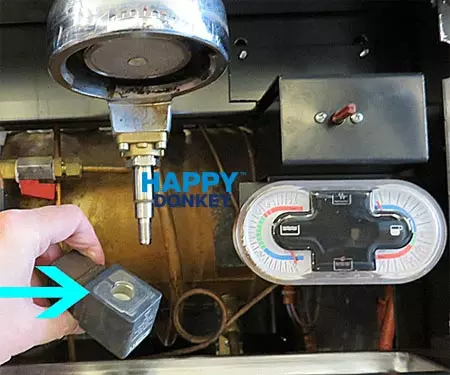
- Position
Position the lead facing the rear of the machine when you slide the coil back up as shown below:
- Then
Hold the coil in place with your left hand and put the info disk, then washer followed by the nut onto the thread.
Do it up hand tight, then finish by tightening the nut with the 14mm spanner.
Again turning to the right.
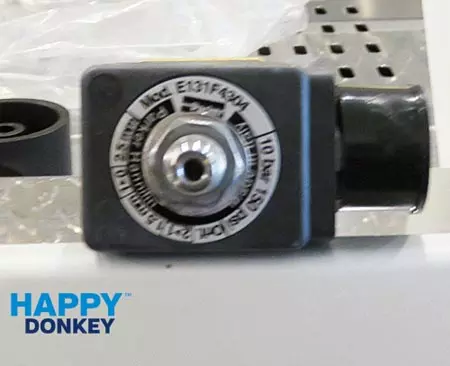
- Note
This is what the end, where the coil nut goes onto, looks like, note well no metal plate.
See to the right side on the drip tray grill is the info disk which goes on before the washer and nut .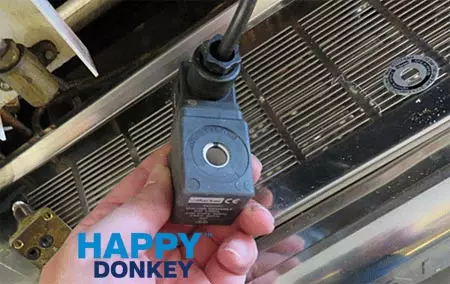
- refit the solenoid exhaust
Now screw the exhaust back on with the 18mm spanner, again turning to the right, do not over tighten, be fairly firm so it’s not hand loose.
Done and dusted !
Put your machine panels back on, reconnect the water and power.
Make yourself a double shot to celebrate.
Futher information:
The machine shown in this guide is an Iberital new Ladri.
The vast majority of commercial espresso coffee machines will utilise a similar kind of group head solenoid system,.
Although variants do exist the principles are nearly always the same.
This tutorial is aimed at people who want to have a go themselves at replacing their failed solenoids.
It should be particularly useful for those running mobile coffee outlets or mission critical operations which run outside of office hours.
Group head solenoids do fail on a regular basis.
It is always handy to keep at least one spare to get you out of trouble in a very short space of time, keep the tools handy too !
It is good practice to swap old solenoids out for new ones on a yearly basis as part of a preventative coffee machine maintenance routine.
Worthy of note is that Parker and Lucifer to all intents and purposes are the same company so if you order one you may get the other.
Lucifer and Parker group head solenoids are made on the same production line.
The labels are the only differentiating feature.
Fault finding a coffee machine group head solenoid problem:
If the commercial machine has heated up but cannot get any water from the head when the button is pressed, presuming the water connection is not turned off, then it will almost certainly be one of three things.
1 ) Failed solenoid or coil:
If your machine has 2 group heads and only one works then this will be the solenoid on the faulty head.
If you do not get the clunk noise from the group solenoid when you press the button to make coffee then it will be the coil which has failed.
Or there could be a problem with the solenoid preventing the coil from operating.
In this situation replace the whole solenoid and coil as if the coil has failed then the solenoid will probably be not that far behind.
A new coil is almost as expensive as a complete solenoid and it’s not woth mucking about with.
If you have a 2 group machine and one side has failed, replace both, again one will generally follow the other in relatively short succession.
2) Pump failure or under performing pump
Pumps in general on commercial machines are either dead or alive.
There is usually little inbetween those two states.
However you may sometimes get a pump which doesn’t perform well prior to giving up the ghost.
Normally though you will still get some water through the head.
If you draw water from the machines water tap and the pump replenishes it straight away then it should have enough oomph to get it out of the group head as well.
3): Blockage in the machine pipework:
If this is the case then the problem will usually develop over a substancial period of time.
You would normally notice prior to falure that your machine had not been it’s normal self.
In this situation you are usually better off getting an enginner to have a look over the machine.
A decent engineer will normally be able to diagnose the issue within a standard call out.
Always ask first though what rates people charge.
If the coffee machine is over 5 years old you may need to get a new one.
Manufacturers build machines to price.
Consequently a life expectancy of 5 years is about right.
DISCLAIMER:
All data and information provided on this site is for informational purposes only.
happybloggy.co.uk or happy donkey limited makes no representations as to accuracy, completeness, currentness, suitability, or validity of any information on this site.
It will not be liable for any errors, omissions, or delays in this information or any losses, injuries, or damages arising from its display or use. Information is provided on an as-is basis.
All articles and tutorials are written by our staff, and the opinions and tutorials expressed here represent our own and not those of the company or any other entities related to happy donkey limited.
Photographs and graphic images are our property,unless otherwise stated, and are being used for informational purposes only.
In no event will we be liable for any loss or damage including without limitation, indirect or consequential loss or damage, or any loss or damage whatsoever arising from loss of data or profits arising out of, or in connection with, the use of this website.
Read how to back flush an espresso machine and keep those solenoids clean.